
Last Updated: November 7, 2026
Quick Summary
Traffic control planning for road repairs is the process of deciding how vehicles, pedestrians and bicyclists will move safely around a work zone while crews work on the roadway. The plan is set out in a traffic control plan (TCP) and should be started before crews arrive. It protects workers, road users and the public while keeping traffic flowing.
- Classify the repair by duration and geometry, since these drive the layout more than anything else.
- Record lane and shoulder widths, speed limits, sight distance and volumes before drafting the layout.
- Sequence phases so only one traffic pattern changes at a time, with a contingency for delayed phases.
- Start agency approval early, because approval timelines often exceed the repair duration.
- Walk the layout with the crew and flaggers before the first closure to confirm sight lines.
Table of Contents
- What a Traffic Control Plan Is and Why Road Repairs Need One
- When a Traffic Control Plan Is Required on a Repair Project
- Step-by-Step Planning Workflow for Road Repairs
- Traffic Control Plan Template: Components to Include
- Single Lane Closure Traffic Control Plan: Layout, Devices and Flaggers
- Applying MUTCD Temporary Traffic Control Plans to Your Project
- Choosing Temporary Traffic Control Plan Software and Field-Checking Your Plan
- Scheduling Your Next Repair Project With ALL Ways Safe
- Frequently Asked Questions
What a Traffic Control Plan Is and Why Road Repairs Need One
Traffic control planning for road repairs is the process of deciding how vehicles, pedestrians and bicyclists will move safely around a work zone while crews work on the roadway, and effective traffic control planning starts before the first crew arrives.
The point of temporary traffic control is to protect three groups at once: workers, road users and the public near the site. It also keeps traffic flowing. A well-drafted plan reduces bottlenecks and congestion, and it gives drivers clear signals about lane closures, lane shifts and detours before they reach the activity area.
Road repairs need a plan even when the job looks small. The Federal Highway Administration’s work-zone program frames this work around defined strategic objectives and performance measures, which is a useful way to think about what a plan has to accomplish (FHWA work zone safety program objectives and performance measures).
When a Traffic Control Plan Is Required on a Repair Project
Whether a plan is required depends on where the work sits and what the road carries. Requirements are set by the agency that owns the road and by applicable traffic control standards, so the first step is confirming which rules apply to your project and jurisdiction.
In practice, a written plan is usually expected when the work intrudes on a public roadway, affects a lane or shoulder, changes the normal path of pedestrians or bicyclists, or requires a detour. Permit conditions often spell out the trigger.
Step-by-Step Planning Workflow for Road Repairs
A repair-specific workflow runs from field assessment through approval, setup, monitoring, and removal. Projects tend to go smoothly when each step produces a document or decision the next step can use, rather than a plan drafted once and never revisited.
Step 1: Assess the Site and Classify the Repair
Walk the site and record travel-lane and shoulder widths, posted speed limits, sight distance in both directions, nearby driveways and intersections, pedestrian routes, transit stops, and the times of day with the heaviest volume. Then classify the repair, because duration and geometry drive the layout more than any other factor:
- Pothole patching and short shoulder work, often measured in hours. A single-lane closure with advance warning, a short taper, and a buffer usually suffices; flaggers may be needed only where sight distance is limited.
- Utility cuts, typically one to several days. The cut often sits mid-block or at an intersection, so the plan must account for turning movements and access to adjacent properties.
- Resurfacing, days to weeks, moving along the corridor. The plan needs a moving work zone, a sequence for milling and paving, and a strategy for maintaining access to driveways and side streets.
Record the classification and the field measurements in the plan file. Reviewers ask for them first.
Step 2: Identify Hazards and Set Performance Targets
Before drafting the layout, list the hazards the repair creates: workers exposed to live traffic, reduced sight distance, night work, adjacent business access, pedestrian diversion, and equipment entering and leaving the site.
Set measurable targets the crew can track in the field. Common indicators include queue length, average delay through the work zone, vehicle speeds at the taper, near-miss reports, and worker exposure time in the activity area.
Step 3: Draft the Layout and Sequence the Phases
Turn the field notes into a layout drawing and a phase sequence. List each phase, the devices required for it, and the point at which each device goes down and comes back up. Sequence phases so only one traffic pattern changes at a time. Build in a contingency for a delayed phase, such as a detour that backs up, and name who on the crew can adjust the layout in the field.
Step 4: Obtain Approval and Coordinate Stakeholders
Submit the plan to the agency that owns the road and confirm permit conditions before scheduling crews. Coordinate with emergency services, transit agencies, and adjacent property owners, and issue advance notice to residents and businesses. Approval timelines often exceed the repair duration, so start early.
Step 5: Set Up, Inspect, and Monitor
Install devices in the sequence the plan specifies, then walk the layout with the crew and flaggers before the first closure. During the work, inspect controls at the frequency the plan states and after any change in scope. Document each inspection and each revision, and keep the revision history with the plan so inspectors can confirm the current layout.
Step 6: Respond to Incidents and Remove the Zone
Have a written response for incidents in the work zone: who calls emergency services, how traffic is held or diverted, and how the layout is restored. When the repair is complete, remove devices in reverse order and confirm that the normal traffic pattern, pedestrian routes, and access points are fully restored before the crew leaves.
The workflow runs in six steps, and the table below summarises what each step produces and when it happens.
| Step | What to do | Time or frequency |
|---|---|---|
| Assess the site and classify the repair | Record lane and shoulder widths, speed limits, sight distance and volumes | Before drafting the layout |
| Identify hazards and set targets | List hazards and set measurable indicators such as queue length | Before drafting the layout |
| Draft layout and sequence phases | Turn field notes into a layout drawing and phase sequence | Before approval |
| Obtain approval and coordinate | Submit the plan and confirm permit conditions with stakeholders | Start early; approval can exceed repair time |
| Set up, inspect and monitor | Install devices in plan sequence and inspect at the stated frequency | Per the plan; after any scope change |
| Respond to incidents and remove the zone | Follow the written response, then remove devices in reverse order | At incident; at project completion |
Traffic Control Plan Template: Components to Include
A usable plan typically contains:
- Project name, location, dates and work hours
- A site layout drawing showing lanes, activity areas and device placement
- A device schedule listing signs, barriers and channelizing devices by phase
- Lane closure and lane shift details, with taper lengths
Use this list as a checklist before submitting the plan for review.
Single Lane Closure Traffic Control Plan: Layout, Devices and Flaggers
A single lane closure is the most common configuration on road repairs, and it is also where layouts most often go wrong.
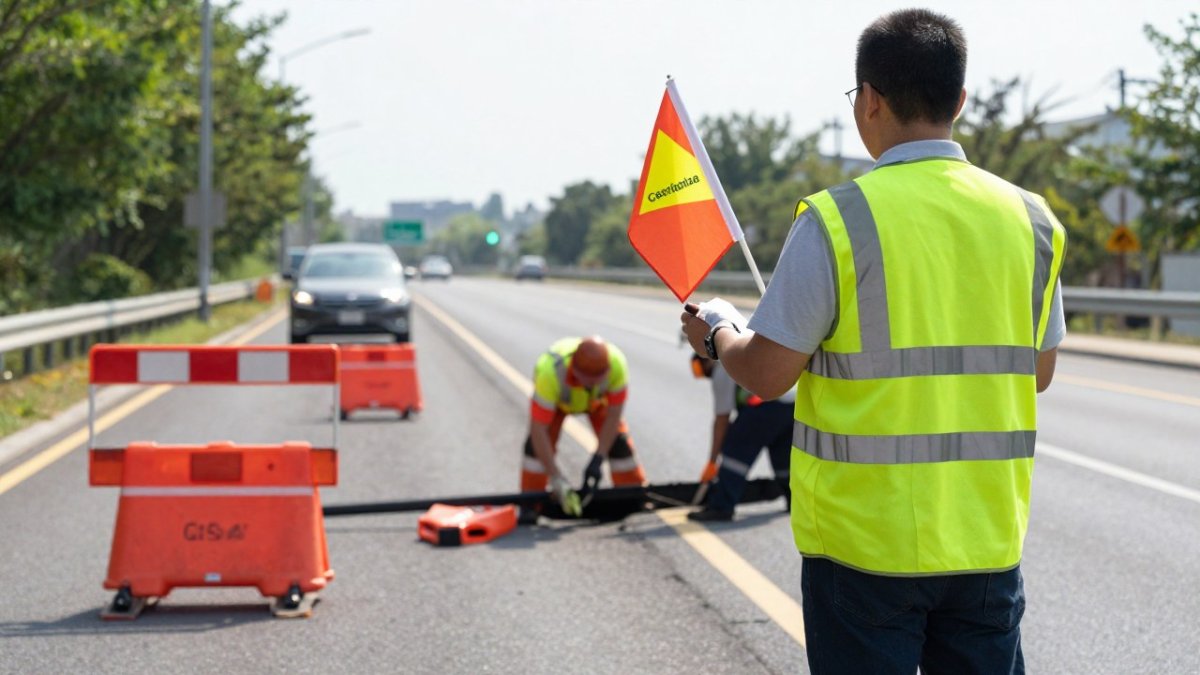
Flaggers are used when a single lane is shared by both directions of traffic or when sight distance is limited.
Watch out: a flagger position chosen only from the drawing often ends up behind a parked truck or a utility pole.
Applying MUTCD Temporary Traffic Control Plans to Your Project
The MUTCD Part 6 covers temporary traffic control and is the national reference most agencies build their own standards from. Treat it as the baseline and check local amendments before finalizing the plan, because agencies commonly add requirements for sign sizes, device types, and advance-warning distances.
Match Devices and Tapers to Road Type and Speed
The standard ties taper length and buffer space to the posted speed limit and the width of the lane being closed. A common pattern is that higher-speed roads require longer advance-warning distances and longer tapers, which in turn push the first sign farther upstream and may require additional devices. Match each sign, channelizing device, and barrier to the standard for your road type and speed limit rather than reusing a layout from a slower corridor.
Document Deviations Before Reviewers Ask
Reviewers ask about exceptions first. When site conditions prevent a standard layout, a short block, a driveway that cannot be blocked, a bridge deck too narrow for the full buffer, document the deviation, the reason, and the compensating control. Keep a copy of the applicable MUTCD section in the plan package so inspectors can confirm the layout quickly.
Build the Field Check Into the Plan
Software can produce drawings and device schedules, but it does not replace a field check. Before the first closure, walk the layout with the crew and flaggers, confirm sign placement and sight lines, and test the detour route.
Watch out: a layout copied from a standard drawing without adjusting for the posted speed limit and lane width is the most common reason a plan is returned for revision.
Choosing Temporary Traffic Control Plan Software and Field-Checking Your Plan
Planning software can produce layout drawings, device schedules and revision histories. Choose a tool that exports to the file formats your agency accepts and that keeps a clear record of plan revisions.
Software does not replace a field check. Before the first closure, walk the layout with the crew and the flaggers, confirm sign placement and sight lines, and test the detour route yourself.
Scheduling Your Next Repair Project With ALL Ways Safe
Planning is easier when the traffic control provider is involved early. ALL Ways Safe provides flagging and traffic control services and is available 24 hours a day, 7 days a week, 365 days a year, including for emergency and storm response.
If your team is preparing a repair project, contact us to talk through your layout, staffing needs and schedule. Request a quote from ALL Ways Safe and our team will review your site requirements with you.
Frequently Asked Questions
What should be included in a traffic control plan?
A traffic control plan for a road repair should show the work zone layout, the activity area, the traffic control devices and road signs, the advance warning sequence, lane closures or shifts, any detours or alternate routes, the number and placement of flaggers, and the hours the work will run. It should also name who is responsible for setting up, inspecting and removing each element. Plans are usually reviewed against MUTCD standards before they are approved, so every device and taper length should be traceable to that manual.
Where can I find a free traffic control plan template?
The Federal Highway Administration publishes the Manual on Uniform Traffic Control Devices, which defines the standard layouts and device types that a template should follow. Many state departments of transportation also publish sample plan sheets for common work zones. A traffic control plan template works best when it is adapted to your site, so treat any free sample as a starting structure and confirm each element against your agency’s requirements before use.
When is a traffic control plan required for road repair work?
A traffic control plan is generally required whenever repair work affects the travel path of road users, including lane closures, shoulder work, utility cuts near the roadway and any activity that changes normal traffic flow. Requirements vary by jurisdiction, so the controlling agency or the permit issuer usually determines whether a plan must be submitted and approved before work begins. Even short-duration work typically needs a plan if it intrudes on the right-of-way.
What software can be used to create traffic control plans?
Several commercial and CAD-based tools are used to draft temporary traffic control plans, and some agencies accept plans produced in standard drafting software as long as they show the required devices and dimensions. When evaluating software, check whether it supports MUTCD-based device libraries, taper and spacing calculations, and exportable sheets that your reviewing agency accepts. For current pricing and options, check with your provider for a quote, since costs depend on the project scope.
How should a single-lane closure be managed during road repairs?
A single-lane closure is managed by setting up advance warning signs, a properly sized taper, channelizing devices along the closed lane, and a buffer space before the work area. Traffic in the open lane is often controlled by a flagger or a pilot vehicle when the open lane is narrow or two-way traffic must share it. The plan should define taper length based on the posted speed, the placement of each device and when the closure is lifted each day.
