Last Updated: November 14, 2026
Quick Summary
Temporary traffic control for road maintenance starts with a site-specific Temporary Traffic Control Plan (TTCP) that maps device placement, tapers, signage, flagging, and removal for one road, crew, and day. Match the work zone layout to road type, traffic volume, speed, and work duration, then build the zone in sequence from advance warning to termination. Inspect the zone each shift and revise the plan when conditions change.
- A complete TTCP covers work duration, road data, device spacing, pedestrian routes, flagging, and setup sequence.
- A 12-foot lane closed at 25 mph needs about a 300-foot taper; at 55 mph, roughly 605 feet.
- Set up from the driver’s view: advance warning, transition, activity, then termination; remove in reverse.
- Position flaggers on the shoulder with an escape path, never in the travel lane unless the stop is established.
- Inspect the full zone at shift start and log each inspection and revision.
Table of Contents
- Start With a Site-Specific Temporary Traffic Control Plan
- Match the Work Zone Layout to Road Type, Volume, and Duration
- Choosing Work Zone Signs and Channelizing Devices
- Build the Work Zone in Sequence: Advance Warning, Transition, Activity, and Termination Areas
- Keep Pedestrians and People With Disabilities Moving Through the Work Zone
- Run Flagging Operations and Night Work Without Raising Worker Exposure
- Inspect, Adjust, and Remove Temporary Traffic Control as Work Progresses
- Get a Quote for Flagging and Traffic Control on Your Next Road Maintenance Job
- Frequently Asked Questions
Start With a Site-Specific Temporary Traffic Control Plan
Work-zone fatalities have risen in recent years, according to the Federal Register notice on work zone safety and mobility. That trend is why temporary traffic control for road maintenance has to start with a written plan, not a truck full of cones. A site-specific Temporary Traffic Control Plan (TTCP) is the standard starting point for a job. A TTCP is a document that maps how traffic moves past a work area: device placement, tapers, signage, flagging, and removal. It turns a general standard into instructions for one road, one crew, one day.
What a Road Maintenance TTCP Must Contain
A complete TTCP covers six things:
- The work description and expected duration
- Road type, speed limit, and traffic volume
- Device list with spacing and taper lengths
- Pedestrian and accessible routes
- Flagging positions and communication method
- Setup and removal sequence
The Florida DOT 2026 design manual, Section 921 requires a project-specific TTCP for all projects. Treat that as the baseline everywhere.
Match the Work Zone Layout to Road Type, Volume, and Duration
The right layout depends on four inputs: road type, traffic volume, speed, and how long the work lasts. Get those wrong and the safest device list still fails.
| Work Duration | Typical Setup | Key Priority |
|---|---|---|
| Short-duration (under 1 hour) | Truck-mounted attenuator, cones | Worker exposure |
| Mobile operations | Slow-moving shadow vehicle | Positive guidance |
| Daytime lane closure | Tapers, arrow board, flaggers | Queue management |
| Night work | Reflective devices, lighting | Visibility |
A 25 mph residential street needs far less than a 55 mph arterial. High-volume roads demand longer advance warning and more channelizing devices. Long jobs justify full lane closures; short ones often don’t.
Choosing Work Zone Signs and Channelizing Devices
Work zone signs and channelizing devices do two different jobs. Signs tell drivers what’s coming. Channelizing devices guide them where to go. You need both, and they must agree. The MUTCD Part 6 names motorists, bicyclists, pedestrians, and people with disabilities as road users whose needs must be controlled through the zone. Every device you place serves one of those groups.
Match the Device to the Job
- Warning signs: advance warning, road work ahead, lane closed. Place them so a driver reading at speed has time to react, the MUTCD’s advance-warning distance scales with posted speed, from roughly 200 feet on a low-speed street to well over 1,000 feet on a high-speed freeway.
- Channelizing devices: cones, drums, barricades, tubular markers. Cones are fast to deploy but tip in wind and get displaced by tires; drums cost more per unit but stay put and stay visible on long jobs.
- Arrow boards: lane shifts and closures on higher-speed roads. Use them where a taper alone would leave drivers guessing which way the lane moves.
- Flaggers: one-lane, two-way traffic and short-duration control where devices cannot resolve the conflict.
Device Spacing and Taper Lengths
Taper length is not a guess.
Space devices closer together in the taper than along the activity area. A common pattern is one cone or drum every 10 feet in the taper and every 20 feet along the activity area, tightening to about 5 feet on high-speed curves. Drums hold up better than cones on long jobs and in wind.
A single displaced cone can break the taper line, so check spacing every time the zone is reset, not just at shift start.
A Quick Selection Matrix by Road Type and Duration
| Condition | Lean toward | Avoid |
|---|---|---|
| Low-speed residential street, under 1 hour | Cones, portable sign stands | Full lane closure, arrow board |
| Arterial at 45 mph or higher | Drums, arrow board, longer taper | Cone-only tapers |
| High-volume commute route | Drums plus advance warning signs, flaggers at merge | Short tapers, night-only setup without lighting |
| Multi-day closure | Drums, barricades, positive barriers where workers are close to traffic | Reusing a short-duration layout |
| Night work | Retroreflective devices, lighting, high-visibility apparel | Non-reflective cones, unlit signs |
Use the matrix to narrow the device list, then confirm against the TTCP and the MUTCD before you deploy. The matrix does not replace the plan, it shortens the argument about which devices belong on the truck.
Build the Work Zone in Sequence: Advance Warning, Transition, Activity, and Termination Areas
Set up from the driver’s point of view, working backward from the work area. The four areas form a chain, and each one depends on the last.
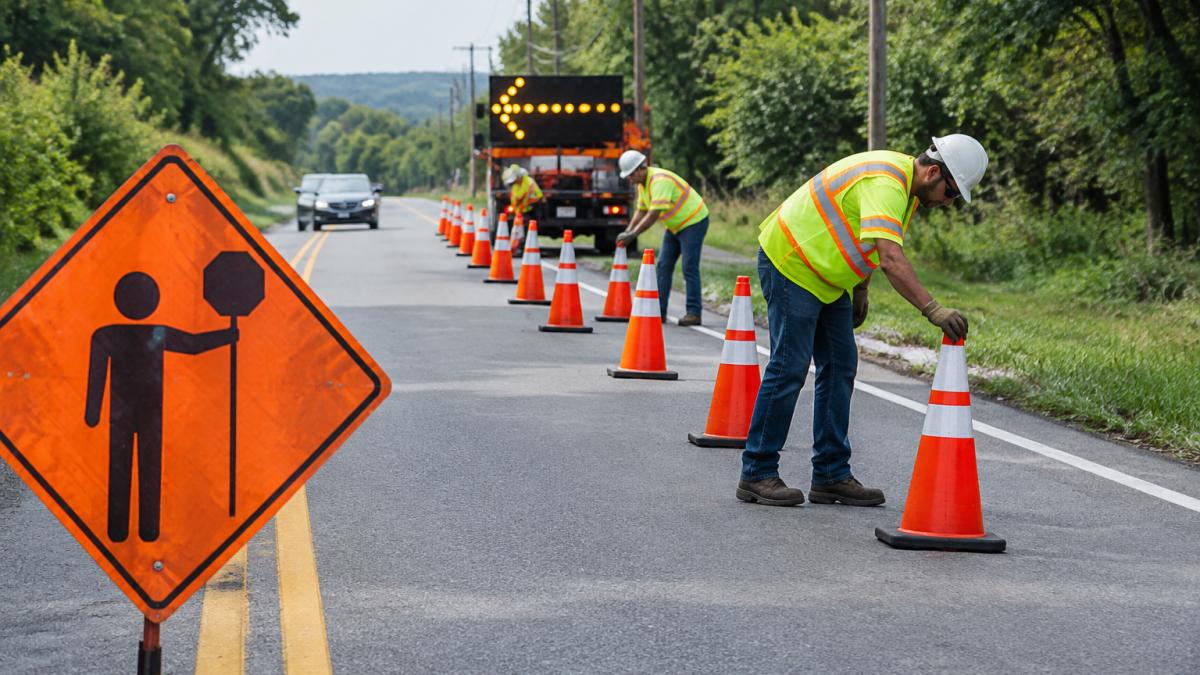
- Advance warning area: place signs first so drivers get early notice
- Transition area: set the taper and channelizing devices
- Activity area: mark the work space and buffer space
- Termination area: show drivers where the zone ends
Remove in reverse: termination first, advance warning last. A 2009 Marquette University study on temporary traffic control measures found flaggers, flashers, and pavement lines reduced the odds of fatal crashes in severe crashes.
Keep Pedestrians and People With Disabilities Moving Through the Work Zone
Pedestrians and people with disabilities are road users too, and they’re the group most often forgotten. A closed sidewalk with no accessible route forces people into traffic. That’s a safety failure and, on public projects, a compliance problem.
Plan the pedestrian path before you close anything:
- Mark a clear, signed walkway around the work area
- Keep the route firm, stable, and wide enough for a wheelchair
- Add detectable warnings at temporary crossings
- Protect the path with barricades, not just cones
If no safe route exists, provide a signed alternate route. Never leave pedestrians to guess.
Run Flagging Operations and Night Work Without Raising Worker Exposure
Flagging is the highest-exposure job on the site. A flagger stands in live traffic, so position and procedure matter more than anything else. Use flaggers only where devices can’t do the job, and pull them back from the travel lane wherever possible.
Position the Flagger Before You Position the Sign
A flagger should stand where drivers can see them from the advance-warning distance, on the shoulder or in a protected pocket, never in the travel lane unless the stop is already established. Give the flagger an escape path, a clear route out of the lane if a vehicle fails to stop, and brief that path at the start of every shift. On two-lane, two-way roads, use a flagger station at each end with a communication method that does not depend on shouting: two-way radio, hand signals agreed in advance, or a pilot car.
Night Work: Visibility Without Glare
Night work trades daylight for cooler temperatures and less traffic, but it also removes the cues drivers rely on. For night operations:
- Use retroreflective devices and high-visibility apparel rated for low light.
- Light the work area without blinding drivers, aim lights at the work, not into the travel lane.
- Shorten tapers only when speed is genuinely reduced, and post the reduced speed where drivers can see it.
- Brief crews on the queue and escape path before the first vehicle passes.
Watch out: a lit work area with an unlit taper is worse than no lighting at all, drivers see the workers and miss the cones, which is the opposite of what the layout is supposed to do.
Monitor the Zone and Revise the Plan
A flagging operation is not set-and-forget. Track a few simple indicators each shift: queue length, travel delay, near misses, and whether drivers are actually obeying the devices. When queue length grows past the advance-warning area, or a near miss is reported, revise the plan before work resumes, add advance warning, lengthen the taper, or move the flagger station. Log each inspection and each revision so the next crew inherits the lesson, not the same exposure.
Coordinate Before the First Cone Goes Down
Flagging and night work both depend on people outside the crew. Before deployment, confirm emergency access routes with local fire and police, share the setup and removal schedule with the agency, and agree on an escalation contact for crashes, weather, or equipment failure. A short coordination call before the job prevents the most common failure: a zone that is safe on paper but blocks the one route an ambulance needs.
Inspect, Adjust, and Remove Temporary Traffic Control as Work Progresses
A work zone is not set-and-forget. Traffic patterns shift, crews move, and weather knocks devices down. Inspect on a schedule and after every change.
- Walk the full zone at shift start
- Check taper and device spacing
- Confirm signs are visible and upright
- Verify the pedestrian route is clear
- Reset any displaced devices
- Remove in reverse order at closeout
Log each inspection. If a crash or near-miss happens, adjust the zone before work resumes.
Get a Quote for Flagging and Traffic Control on Your Next Road Maintenance Job
Planning a compliant zone takes time most crews don’t have. That’s where we come in. ALL Ways Safe provides 24/7 flagging and traffic control, and we’re certified by the Women’s Business Enterprise National Council. You can browse our blog for more field guidance before your next project.
Road maintenance doesn’t pause for traffic, and your traffic control shouldn’t pause for staffing gaps. ALL Ways Safe keeps crews and the public safe with around-the-clock coverage, detailed work-zone planning, and fast emergency response. Get started with ALL Ways Safe and keep your next job running smoothly and safely.
Frequently Asked Questions
What should a temporary traffic control plan include?
A temporary traffic control plan should identify the work duration and road type, set device spacing and taper lengths, and map the advance warning, transition, activity, and termination areas. It also needs flagger positions, pedestrian and accessible routes, and a removal sequence. The Federal Highway Administration’s MUTCD Part 6 names motorists, bicyclists, pedestrians, and people with disabilities as road users whose needs must be addressed. Some states go further with their own requirements, so check your own agency’s rule before you build.
How do you choose the right work zone signs and channelizing devices?
Match the device to the speed limit, traffic volume, and how long the work lasts. Cones and channelizing devices handle short-duration and mobile operations, while barricades and arrow boards suit longer lane closures and lane shifts. Space devices so drivers get positive guidance through the taper and transition areas, and keep warning signs visible for the full approach. A 2009 Marquette University study found flaggers, flashers, and pavement center or edge lines effective in reducing the probability of fatal crashes in severe work-zone crashes, which supports pairing devices rather than relying on one.
How should traffic control be adjusted as road maintenance work progresses?
Walk the work zone at each shift change and after any phase move. Reset device spacing when the activity area shifts, confirm warning signs still face approaching traffic, and check that the taper length still matches the posted speed. Remove devices only in reverse order, from the termination area back to the advance warning area, so drivers never meet an unprotected edge. Work-zone fatalities have risen in recent years, which is why inspection and adjustment belong in the daily routine, not just the initial setup.
How many hours can flaggers work in a day?
There is no single federal cap on flagger hours; limits come from your state agency’s rules and from hours-of-service or labor agreements that apply to the project. Plan flagging around the actual closure window, add relief for long or night shifts, and build in breaks so attention stays sharp through the queue. Confirm the specific limit with the agency issuing the permit before you staff the job, and keep a backup flagger on call so a no-show does not stall the closure.
