
Last Updated: November 13, 2026
Quick Summary
A temporary traffic control plan is a site-specific layout showing how traffic, workers, and pedestrians move through a work zone. Common examples include a lane closure on a two-lane road, one-lane two-way operation with a flagger, and a pedestrian and bicycle detour at an intersection. Every plan needs four elements: advance warning, transition, activity, and termination areas.
- A 12-foot lane at 45 mph needs a merging taper of about 405 feet.
- Flagger sight distance must equal stopping sight distance for the posted speed.
- Accessible pedestrian routes must be at least 4 feet wide with detectable warnings.
- Reviewers reject plans with short tapers, missing buffer dimensions, or inaccessible pedestrian routes.
- Update and resubmit the plan when site conditions change after approval.
Table of Contents
- What Temporary Traffic Control Plan Examples Show You
- The Four Basic Elements of a Temporary Traffic Control Zone
- Temporary Traffic Control Plan Requirements Under the MUTCD
- Simple Temporary Traffic Control Plan Examples for Common Scenarios
- How to Create and Submit a Traffic Control Plan Step by Step
- Free Traffic Control Plan Template and Review Checklist
- Adapting Plan Examples to Site Conditions and Multimodal Access
- Get a Quote for Flagging and Traffic Control Support
- Frequently Asked Questions
What Temporary Traffic Control Plan Examples Show You
A temporary traffic control plan is a site-specific layout that shows drivers, workers, and pedestrians exactly how traffic will move through or around a work zone.
Below, we walk through real scenario examples, the four core elements every plan needs, and a step-by-step workflow for getting yours approved. The checklist at the end can serve as a starting point for your own review.
But first, here’s what most guides get wrong. They show you a diagram with no explanation of why each cone sits where it does.
The Four Basic Elements of a Temporary Traffic Control Zone
Every compliant work zone breaks into four parts, and each one has a job. Miss one and your plan fails review.
- Advance warning area: tells drivers what’s coming before they reach it
- Transition area: moves traffic out of its normal path with a taper
- Activity area: the actual work space, plus buffer space and an escape path
Think of it as a story with a beginning, middle, and end. The Federal Highway Administration’s guidance on traffic monitoring and work zone operations reinforces how much layout and data quality shape real-world outcomes.
Temporary Traffic Control Plan Requirements Under the MUTCD
The Manual on Uniform Traffic Control Devices sets the national standard for signs, signals, and pavement markings in work zones. A plan that ignores MUTCD spacing and device rules will get sent back.
Key requirements to build into any plan:
- Correct sign spacing based on posted speed
- Proper taper length for the speed and lane width
- Channelizing devices that guide, not confuse
The Wayne State University Transportation Research Group’s work on temporary traffic control planning software shows how digital planning tools now help teams draft and check these layouts faster.
Simple Temporary Traffic Control Plan Examples for Common Scenarios
Three scenarios cover most of what field crews face. We use these as starting points, then adjust for speed, volume, and sight distance. Each example below lists the devices a reviewer expects to see, the spacing rules that drive the layout, and the site conditions that force changes.
Example: Lane Closure on a Two-Lane Road
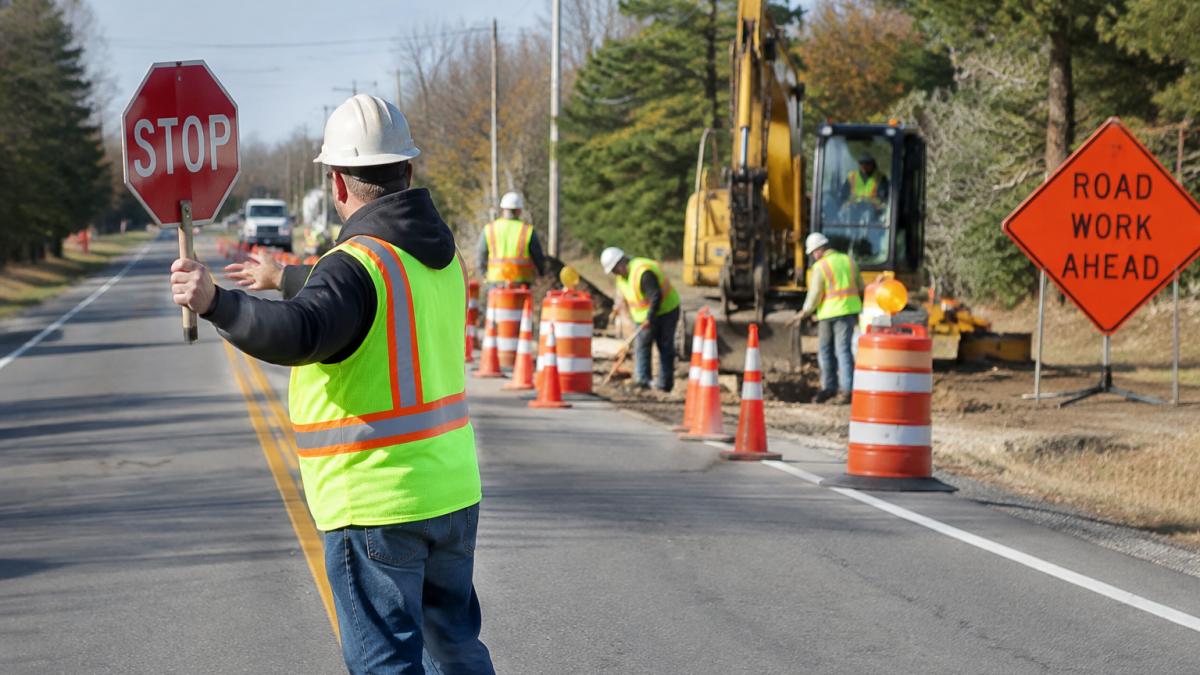
One lane closes and traffic uses the remaining lane. A complete plan for this scenario shows:
- Advance warning signs in the order drivers expect: ROAD WORK AHEAD, then LANE CLOSED AHEAD, then a directional arrow board or arrow sign at the taper. Sign placement should follow the MUTCD distances for the posted speed.
- A merging taper sized by the formula L = W × S for speeds of 40 mph or less, where W is the lane width in feet and S is the posted speed. At 45 mph and above, use L = W × S² / 60. A 12-foot lane at 45 mph therefore needs a taper of about 405 feet.
- A buffer space between the taper and the work area, kept free of workers, equipment, and stockpiles. Treat it as a crash cushion, not storage.
Watch out: a plan that shows the taper but omits the buffer space is one of the most common reasons a submittal comes back, because the buffer is what protects the crew when a driver drifts.
Example: One-Lane, Two-Way Operation with a Flagger
Here a single lane carries traffic in both directions. The plan must show:
- Flagger stations at each end, positioned so each flagger can see approaching traffic for the stopping sight distance the posted speed requires, and so the two flaggers can see each other or communicate by radio.
- A waiting area sized so queues do not back into an intersection, driveway, or curve. If the queue would reach an intersection, the plan needs a second flagger or a temporary signal.
- Signs on both approaches: ROAD WORK AHEAD, ONE LANE ROAD AHEAD, and a flagger symbol sign, plus a STOP/SLOW paddle at each station.
Example: Pedestrian and Bicycle Detour at an Intersection
Work at an intersection often blocks the crosswalk. A reviewer will look for:
- An accessible pedestrian route at least 4 feet wide, separated from traffic by a continuous barrier, with detectable warnings and a firm, stable surface. Ramps at each end must meet the same slope limits as a permanent curb ramp.
- Signed detour routes with PEDESTRIAN DETOUR signs at every decision point, not just at the closure.
- A temporary bus stop if transit runs through, with its own accessible path and a sign telling riders where the stop moved.
Example: Utility Work on a Residential Street
Short-duration utility work on a low-speed street needs a lighter layout: a WORKERS AHEAD sign, cones around the excavation, and a flagger only if the crew must enter the travel lane. The plan should still show the buffer between cones and the trench, because a residential street leaves little room for error.
Example: Road Maintenance on a Rural Road
On a rural road, the constraint is usually sight distance, not volume. Show warning signs farther out on curves and crests, add a flagger if the work sits just over a hill, and note any reduced speed limit through the work zone.
Example: Special Event on an Urban Street
Event plans combine a temporary traffic control layout with crowd management. Show barricades at cross streets, a pedestrian-only zone, and a signed detour for through traffic, plus the times each device goes in and comes out.
To adapt any of these examples, change the taper length first when speed changes, then recheck sign spacing, then recheck the buffer.
These are the common scenarios we use as starting points, each with the devices and rules a reviewer expects to see.
| Scenario | Key devices | Spacing or sizing rule |
|---|---|---|
| Lane closure on a two-lane road | Advance warning signs, arrow board or arrow sign, merging taper, channelizing devices | Taper L = W × S at 40 mph or less; L = W × S² / 60 at 45 mph and above |
| One-lane, two-way with a flagger | Flagger stations, STOP/SLOW paddles, signs on both approaches, pilot car, portable signals | Flagger sight distance equals stopping sight distance for posted speed |
| Pedestrian and bicycle detour at an intersection | PEDESTRIAN DETOUR signs, continuous barrier, detectable warnings, temporary bus stop | Accessible route at least 4 feet wide |
| Utility work on a residential street | WORKERS AHEAD sign, cones around excavation, flagger if crew enters travel lane | Buffer shown between cones and trench |
| Road maintenance on a rural road | Warning signs farther out on curves and crests, flagger if work is over a hill | Constraint is sight distance, not volume |
| Special event on an urban street | Barricades at cross streets, pedestrian-only zone, signed detour for through traffic | Show times each device goes in and comes out |
How to Create and Submit a Traffic Control Plan Step by Step
A solid plan follows a repeatable sequence. Here’s the workflow we use, with the input and output of each step so you can check your own work.
- Scope the work. Define the task, duration, lane impact, and whether the work moves. Input: project description and schedule. Output: a one-paragraph scope statement that names the street, the limits, and the hours.
- Check traffic data. Note volumes, posted speed, peak hours, and heavy-vehicle percentages. Input: traffic counts or agency data. Output: the design speed and the hour that drives the layout.
- Pick your scenario. Match the work to a lane closure, flagging operation, detour, or shoulder closure. Input: the scope and traffic data. Output: a base layout to adapt.
- Draft the layout. Place signs, tapers, buffers, and channelizing devices to MUTCD spacing. Input: the base layout and the design speed. Output: a scaled drawing with a device list and quantities.
- Add multimodal access. Mark pedestrian, bicycle, and transit routes, including temporary stops and accessible paths. Input: the existing sidewalk and transit map. Output: detour routes with signs at every decision point.
- Review against local rules. Confirm agency supplements and permit needs. Input: the local agency’s work-zone guidance and permit application. Output: a compliance note listing any local additions to the MUTCD.
- Submit for approval. Include the plan, schedule, device list, and traffic data. Input: the completed package. Output: a submittal number and reviewer contact.
- Verify in the field. Walk the site before work starts and adjust as needed. Input: the approved plan. Output: a field-check note with photos and any changes.
What Reviewers Check Before They Approve
Agency reviewers commonly check the following. Build them into your draft so the first submittal passes:
- Sign spacing matches the posted speed, not the design speed you wish you had.
- Taper length is calculated, not eyeballed, and shown on the plan.
- Buffer space is dimensioned and kept clear of equipment.
Common Rejection Reasons
A submittal usually comes back for one of a few reasons: a taper too short for the posted speed, missing buffer dimensions, a pedestrian route that fails accessibility, no plan for peak-hour queues, or a device list that does not match the drawing. Fixing those five items before you submit saves a review cycle.
Digital Tools and Field Verification
Mapping and plan software help teams draft and check layouts faster, and many agencies now accept digital submittals. The ATSSA case studies on technology solutions for temporary traffic control operations show how devices like automated flagger assistance tools fit into these layouts.
Watch out: if conditions change after approval, a new lane shift, a longer duration, a different device, update the plan and resubmit rather than improvising in the field, because the approved drawing is what the inspector will check against.
Free Traffic Control Plan Template and Review Checklist
Use this checklist before you submit any plan. It’s the same review we run on our own layouts.
- Advance warning signs spaced to posted speed
- Taper length matches speed and lane width
- Buffer space kept clear of workers and equipment
Watch out: the most common review failure is a taper that’s too short for the posted speed. It looks fine on paper and fails in the field.
Adapting Plan Examples to Site Conditions and Multimodal Access
No template survives contact with a real site unchanged. Curves, hills, driveways, and heavy turning traffic all force adjustments.
Adapt by checking three things:
- Sight distance: shorten or extend warning areas on curves and crests
- Access points: protect driveways and side streets with extra devices
- Multimodal continuity: keep pedestrian, bicycle, and transit routes usable
For ongoing reading on these adjustments, our Making Traffic Safe Again Archives cover field-tested approaches to work zone safety. You can also browse the full ALL Ways Safe blog for more scenario examples and planning tips.
Get a Quote for Flagging and Traffic Control Support
Building a compliant plan is half the job. Staffing it with trained flaggers who show up on time is the other half, and that’s where crews get burned.
ALL Ways Safe provides 24/7 professional flagging and traffic control across the Greater Tri-State and Mid-Atlantic regions. As a woman-owned, family-operated business certified by the Women’s Business Enterprise National Council, we handle detailed planning, smart work zones, and rapid emergency response. Our crews are available 24 hours a day, 7 days a week, 365 days a year, including for planned utility repairs and rapid storm response.
Request a quote from ALL Ways Safe to discuss staffing for your next work zone.
Frequently Asked Questions
Can you provide an example of a traffic control plan?
A simple example is a lane closure on a two-lane road: advance warning signs placed at the MUTCD distances for the posted speed, a taper of cones or drums guiding traffic out of the closed lane, a buffer space between the taper and the workers, the activity area where crews work, and a termination area that returns traffic to normal. Plans also note flagger positions, pedestrian access, and any detour routes. The layout changes with speed, volume, and sight distance.
What is a temporary traffic control plan?
A temporary traffic control plan is a site-specific document that shows how road users, workers, and pedestrians will be guided safely through or around a work zone. It maps the traffic-control zones, signs, channelizing devices, flagger or pilot-car operations, and access routes. Under the MUTCD, plans are required for situations such as road closures, lane closures on high-speed roads, and any work that changes normal traffic patterns. Local agencies often add their own submission requirements.
Which are the four basic elements of a temporary traffic control zone?
The four basic elements are the advance warning area, where signs tell drivers what to expect; the transition area, where channelizing devices move traffic out of its normal path; the activity area, which includes the buffer space, work space, and traffic space; and the termination area, where traffic returns to its normal path. Each element has MUTCD guidance on sign spacing, taper length, and buffer distance based on posted speed and site conditions.
Where can I find a free traffic control plan template?
Many state departments of transportation and municipal public works departments publish free temporary traffic control plan templates and standard drawings. The MUTCD itself provides typical layouts in Part 6 that you can adapt. A workable template includes fields for project limits, posted speed, traffic volume, sign and device spacing, flagger positions, pedestrian routes, and a review sign-off. Always confirm the template matches the requirements of the agency issuing the permit.
