Last Updated: November 18, 2026
Quick Summary
To choose a night work traffic control setup, build a written traffic control plan in daylight, then match one of five options (shoulder closure, lane closure with taper, alternating one-way traffic, full closure with detour, or mobile operation) to your road type and work duration. Tighten device spacing for night visibility, aim work lights so they never blind drivers, and walk the site from the driver’s seat before every shift.
- The FHWA names reduced visibility, driver fatigue, and impaired driving as the core nighttime hazards.
- A shoulder closure is the lowest-exposure option and the fastest to set up and remove.
- The New Jersey DOT guide advises decreasing device spacing for nighttime work to improve visibility.
- Temporary traffic control devices for night work must be retroreflectorized, and workers must wear retroreflectorized vests.
- If you cannot see the flagger from 200 feet back, the driver cannot either.
Table of Contents
- Why Night Work Traffic Control Demands a Different Setup
- Step 1: Build a Work Zone Traffic Control Plan Before Dark
- Step 2: Match Your Setup to the Road and Work Type
- Step 3: Select Temporary Traffic Control Devices for Night Visibility
- Step 4: Design Nighttime Work Zone Lighting and Control Glare
- Step 5: Place Flaggers and Devices for Nighttime Conditions
- Step 6: Run a Night Work Traffic Safety Checklist and Field Review
- Step 7: Staff and Verify Your Night Work Traffic Control Setup
- Frequently Asked Questions
Why Night Work Traffic Control Demands a Different Setup
Night work traffic control is the practice of planning, placing, and maintaining temporary traffic control devices so that drivers and workers stay safe after dark. The Federal Highway Administration identifies reduced visibility, driver fatigue, and a higher risk of impaired driving as the core nighttime hazards, and it calls for clear signage, effective lighting, high-visibility apparel, and well-planned traffic control to answer them (FHWA night work guidance).
Night work buys you something real: fewer cars in the way. It also takes something away. Drivers see less, react slower, and share the road with more impaired motorists. Your setup has to close that gap before the first cone goes down.
Step 1: Build a Work Zone Traffic Control Plan Before Dark
A work zone traffic control plan is a written layout of every sign, cone, barrier, and flagger station on the job, plus the spacing and sequence for setting them up.
Start with the components the American Traffic Safety Services Association defines for an activity area: the work space, the traffic space, and the buffer space between them.
Then answer three questions in writing:
- What is the speed limit at the site, and what speed do drivers actually run?
- What is the traffic volume at the hour you plan to work?
- Where does the advance warning start, given sight distance at night?
The FHWA’s 2024 work zone safety rulemaking amends the rules governing traffic safety and mobility in highway and street work zones.
Step 2: Match Your Setup to the Road and Work Type
The right setup depends on three things: the road type, how long the work lasts, and whether you can close a lane or only a shoulder. A utility repair on a two-lane road needs a different answer than a bridge deck pour on an interstate. Most guides stop at that sentence. The useful work is comparing the five night-work options side by side and knowing which one your site can actually support.
The five night-work setup options and when each fits
| Setup option | Best fit | Night-specific tradeoffs |
|---|---|---|
| Shoulder closure | Short-duration work that can stay off the travel lane; any road type | Lowest exposure and fastest to set up, but only works if the work space fits the shoulder and workers never step into the lane; advance warning still has to be visible at night |
| Lane closure with taper | Multi-lane highways; work that needs the lane for several nights | Gives workers a protected activity area and a buffer, but the taper and arrow board must be visible from far enough back at night, and the closure concentrates traffic into fewer lanes |
| Alternating one-way traffic | Two-lane roads where a full closure is impractical | Uses a flagger or temporary signal to share the open lane; at night the flagger station needs lighting without glare and a clear escape route, and queues build quickly at higher volumes |
| Full road closure with detour | Work that cannot tolerate traffic, or a road too narrow to share | Removes traffic from the work space entirely, but the detour must be signed and lit for drivers who do not know the area, and message boards need to warn well in advance |
| Mobile operation | Short moves along a corridor, such as striping or sweeping | Keeps the crew moving with the work, but the shadow vehicle and warning lights have to be visible at night and the crew cannot stop in the travel lane |
Night-specific decision tree for setup selection
Work through these questions in order, and stop at the first one that applies:
- Can the work stay off the travel lane? If yes, use a shoulder closure with advance warning. It is the lowest-exposure option and the fastest to set up and remove.
- Is the work short-duration and can it move? A mobile operation with a shadow vehicle and warning lights keeps the crew ahead of traffic instead of holding a lane for hours.
- Can the road share one lane? On a two-lane road, alternating one-way traffic with a flagger or temporary signal is often the only practical option, but plan for queues and light the flagger station without glare.
- Does the work need the lane for hours on a multi-lane road? Build a full taper with an arrow board, channelizing devices, and a buffer space.
- Can the road be closed entirely? Use a detour with barricades and changeable message signs, and sign the detour for drivers who do not know the area.
The New Jersey DOT setup guide advises decreasing the distance between devices for nighttime work to improve visibility (NJDOT work zone setup guide). Tighter spacing gives drivers a continuous visual line instead of gaps they read as open road.
Watch out: the cheapest option is not always the lowest-risk one. A shoulder closure that forces workers to step into the lane for a moment is more exposed than a lane closure with a proper buffer, and a flagger operation on a high-speed road at night can put the flagger closer to traffic than the plan assumes.
Step 3: Select Temporary Traffic Control Devices for Night Visibility
Temporary traffic control devices for night work must be retroreflectorized, and workers must wear retroreflectorized vests. The Kentucky Transportation Cabinet states it plainly in its work zone guidelines (Kentucky work zone guidelines).
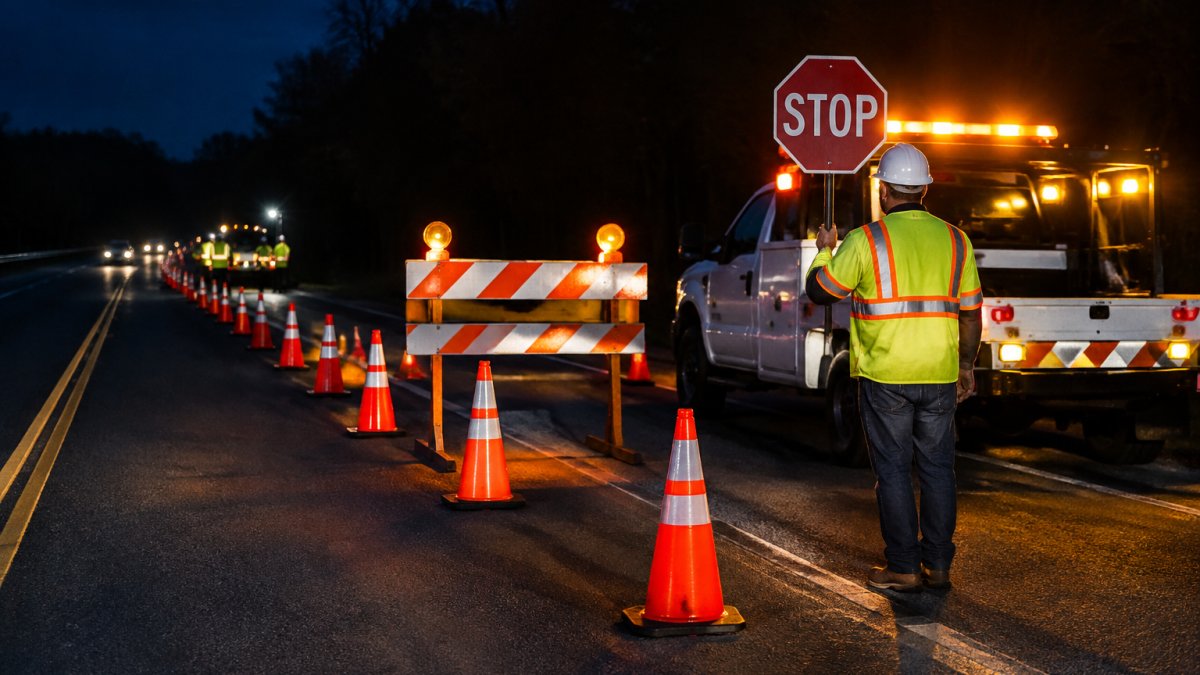
Device selection comes down to four categories:
- Signs: retroreflective sheeting rated for nighttime viewing, sized for the speed of the road
- Channelizing devices: cones and drums with reflective bands, spaced closer than daytime
- Barriers: positive protection where workers sit close to traffic
Here is where most setups fail. Crews buy reflective devices, then place them so far apart that drivers see individual dots instead of a lane edge. Tighten the spacing at night and the path reads clearly.
Step 4: Design Nighttime Work Zone Lighting and Control Glare
Nighttime work zone lighting serves two audiences, and they want opposite things. Workers need to see the task. Drivers need to see the path without being blinded. Most guides mention glare control and move on. The design work is in placement, aiming, and checking the result from the driver’s seat.
Place work lights for the task, not for the road
Balloon lights and light towers aimed at the work space do the first job. The goal is even light on the task with the brightest source kept out of the driver’s line of sight.
Shielding and correct aiming do the second job. Point lights down and away from oncoming traffic, and keep the brightest source behind the taper, not in front of it.
Balance task lighting with sign and device visibility
Bright task lighting can wash out the retroreflective sheeting on signs and channelizing devices if the light spills onto them from the wrong angle. The practical fix is to keep work lights aimed at the work space and let the devices do their job with retroreflectivity and warning lights. If a sign or cone line looks dim from the driver’s seat, the answer is usually to reposition the light, not to add more of it.
Control glare toward drivers
Glare control matters more than most crews admit. The main sources are unshielded light towers, lights aimed across the travel lane, and bright work lights placed in front of the taper. Shielding, correct aiming, and keeping the brightest source behind the taper address most of it. A second pass after the first hour of traffic is worth the time, because lights get bumped and re-aimed during setup.
Check visibility in bad weather
Rain and fog change the problem. Wet pavement reflects light back at the driver and can turn a well-aimed light tower into a glare source, and fog scatters light so that a bright source becomes a wall rather than a guide. In those conditions, rely more on retroreflective devices and warning lights and less on high-mounted work lights, and slow traffic with advance warning rather than trying to light the whole site.
Test it before the shift
Walk the site from a driver’s seat height and look for:
- Lights that hit your eyes directly
- Dark gaps between lit areas
- Shadowed flagger stations
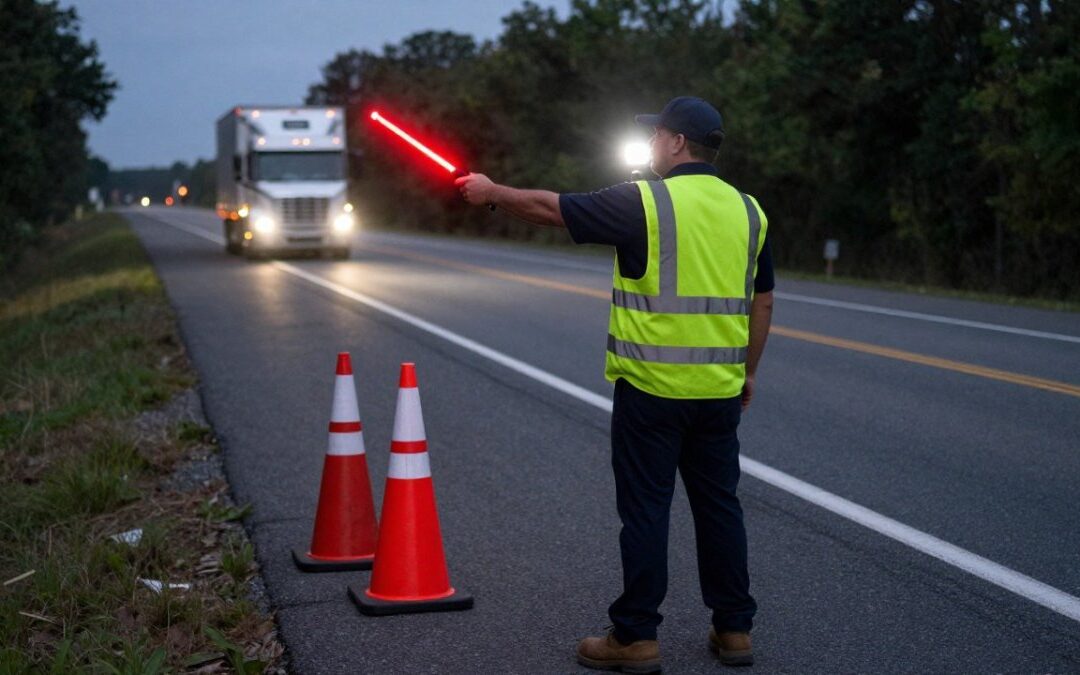
If you cannot see the flagger from 200 feet back, the driver cannot either. Watch out: a site that looks well lit from the shoulder can still blind a driver at speed, so the check has to be done from the travel lane, at night, with the lights running.
Step 5: Place Flaggers and Devices for Nighttime Conditions
Flagger placement at night follows the same logic as daytime, with two additions: visibility and escape room. Put the flagger where drivers can see the paddle from the farthest useful distance, and where the flagger has somewhere to step.
The Federal Highway Administration’s nighttime work zone safety initiative pushes agencies toward safer, more innovative nighttime practices (FHWA nighttime work zone safety initiative). Flagger station design is one of the places that pays off.
Place devices in this order:
- Advance warning signs, set at the distance your sight line allows
- Taper, built from the shoulder toward the closed lane
- Buffer space, kept empty of people and equipment
- Flagger station, never inside the taper
- Termination area, with a clear return to the normal lane
A common mistake is parking the flagger’s vehicle inside the buffer. It looks convenient. It also removes the one space that protects the flagger when a driver misses the taper.
Step 6: Run a Night Work Traffic Safety Checklist and Field Review
A night work traffic safety checklist is only useful if someone walks the site after dark with it in hand. Paper review in the trailer proves nothing.
Run this before every shift:
- All devices retroreflectorized and clean
- Device spacing tightened for night conditions
- Advance warning visible from the required sight distance
Walk it from the driver’s side, not the shoulder. Then walk it again after the first hour of traffic, because devices move.
Step 7: Staff and Verify Your Night Work Traffic Control Setup
The best plan on paper fails without trained people on site at the right hour.
Verification comes down to three checks:
- Certification: ask for current flagger training records, not a verbal assurance
- Coverage: confirm the crew is committed for the full shift, including setup and removal
- Backup: know who fills a gap if someone calls out
This is where we do the work for you.
For more practical traffic-safety guidance and updates, read our blog.
Night work only pays off when the setup matches the conditions.
ALL Ways Safe handles the planning and the flagging so your crew can focus on the repair.
Frequently Asked Questions
What are the four components of a work zone?
A work zone has four main areas: the advance warning area, where drivers first learn about the work; the transition area, where traffic shifts out of the closed lane; the activity area, which holds the work space, traffic space, and buffer space; and the termination area, where traffic returns to normal. The American Traffic Safety Services Association defines the activity area this way, and laying out each part correctly is the foundation of any night work traffic control setup.
What lighting is needed for a nighttime work zone?
Nighttime work zone lighting should light the work space and flagger stations without blinding drivers. Position lights so glare stays off the travel lane, use shielded fixtures, and keep consistent illumination across the activity area. Retroreflectivity is the standard expectation for all traffic-control devices used at night, and workers should wear retroreflectorized vests. Pair that retroreflectivity with deliberate lighting placement, and drivers see the work zone clearly without losing sight of the road.
How should a work zone traffic control plan account for reduced visibility at night?
The Federal Highway Administration lists reduced visibility, driver fatigue, and increased risk of impaired driving as nighttime hazards. A work zone traffic control plan should respond with clear signage, effective nighttime work zone lighting, high-visibility apparel, and well-planned device placement. Decreasing the distance between devices for night work also gives drivers more warning in less light. Build these adjustments into the plan before crews arrive on site.
What belongs on a night work traffic safety checklist?
A night work traffic safety checklist should confirm retroreflectivity on every sign, cone, and barrier; verify warning lights are working; check that flaggers wear retroreflectorized vests and stand in lit, visible positions; confirm lighting placement without glare into traffic; and walk the taper and buffer spacing. Add a field review after setup and again mid-shift. The FHWA night work guidance also calls for clear signage and well-planned traffic control, so check those against the plan at every shift change.
